Ready to master the art of skateboarding but don’t like your new skateboard that you bought from a top brand? Is it not the right size for you and doesn’t fulfill your needs? Well, even if you’re a regular skater and your Skateboard deck is wearing out, you might have to face similar issues when you hit the market to buy yourself a new one.
So, what’s the solution then? Well, fortunately, you can make your own skateboard deck at home. Wondering how to make skateboard deck to begin your skateboarding journey? To be honest, it’s pretty simple and a low-budget alternative to buying Best Skateboard decks from the top brands out there.
What’s surprising is that you don’t need to be a master carpenter to make yourself a skateboard deck. In fact, all you need is some basic knowledge of carpentry, and you are good to start.
How To Make Skateboard Deck At Home?
Now, if you are ready to start, here are 4 simple steps you need to follow to make your own skateboard deck at home. Test your creativity now!
Things You’ll Need:
-
- Thin Air Press Vacuum bag
- Thin Air Press manual hand pump
- Breather Netting
- Glue
- Masking tape
- Skateboard Veneers
- Foam mold
- Jigsaw
- Belt Sander
- POSCA Pens
Once you have all the required stuff, here’s what you need to do next!
1. Shaping, Gluing, and Molding
To make a personalized skateboard deck you should first decide the size of your Skateboard. Once you have that in mind, start by rounding up your Skateboard Veneers and lay them in the order you want to laminate.
Next, apply glue evenly between the layers. Make sure that you apply the glue consistently between each layer of Veneer to ensure that it dries evenly and no bubbles are formed between the layers. You can work with as many layers of Veneers as you want, but 6-9 layers are generally used in a standard skateboard.
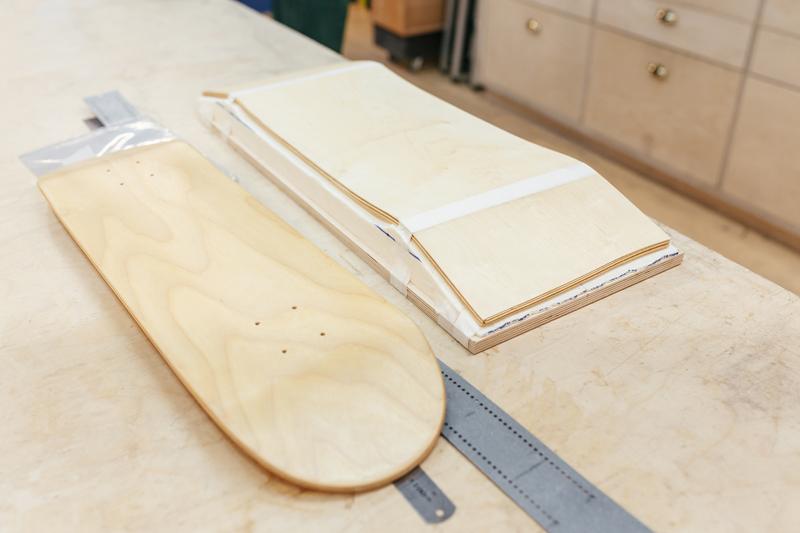
Now, align all the Veneer layers on the foam mold and slide it into the Thin Air Press Vacuum bag. Ensure that the veneers are exactly where they should be on the mold. If any of the edges have shifted during the gluing process, line them up first.
Once the project is in the bag, attach the breather netting strip inside the bag so that the valve doesn’t stick to the veneer surface. Seal the bag properly, and use a Thin Air press manual hand pump to evacuate any air out of it.
You can now leave the board so that it can mold all the day. Keep checking after every 2 to 3 hours and make sure that it’s still airtight. Now, remove the wood very carefully so that the vacuum bag isn’t ripped off and you can use it for your future decks as well. Let some air inside, and slide your board out slowly. Once you have pulled the bag out of way, it’s time to remove the molds as well.
Put some old board on the pressed wood and trace its shape so that the board could be cut into a perfect shape. Use jigsaw to cut the model board into your home-made skateboard deck.
2. Sanding and Sealing
Now that you have a perfectly cut board, you can make the curves with the help of a Belt Sander. Sand the entire deck so that it bends slightly from one end. Curve the edge of the board towards the wheels and make sure that it’s not more than 4 to 5mm. Use fine sandpaper to smooth out the ends of the Skateboard evenly.
3. Style your Skateboard deck

You must be willing to have a funky look to your skateboard, just like the expensive ones on the market. For that, you can use spray paints and stencils to decorate your Skateboard, or you can just play it safe by using some POSCA pens to draw anything you like. You don’t have to be an artist to nail this step, just give a personalized feel to your Skateboard by being creative or keeping it simple.
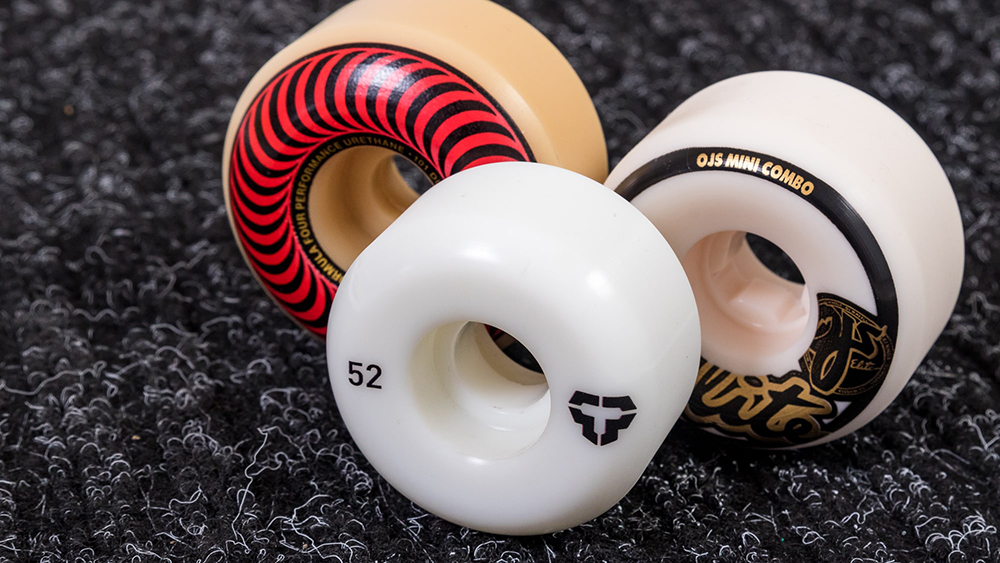
4. Choose your Wheels
You’ll find so many different types of Best Skateboard wheels on the market. It is always a good idea to choose your skateboard wheels depending on your level of expertise. If you are a beginner, go for the starter wheels that are usually 52-55mm in diameter and make an ideal option for most terrains. If you are a skater who loves to do tricks, find yourself smaller but harder wheels with 50mm diameter. On the contrary, if cruising is your style then you should get your hands on the softer and bigger wheels with around 70mm diameter.
So, why run after those expensive skateboards when you know how to make skateboard deck at home? With the right set of tools and the best materials, you can easily make your custom best skateboard now. Just follow the simple steps listed above and you’ll have a new budget-friendly, customized skateboard ready to cruise through the streets. Give it a try now!